A Guide To Smoking A Brisket
We’ll walk you through nine steps to help you get started smoking a brisket in this article. The smoking method on briskets requires a total cook time of 12-18 hours. Take a look at the following:
Step 1: SELECTING
The problem most people have with brisket is that it’s a tough cut of meat. This makes it perfect for low and slow cooking. Selecting the right brisket from the butcher shop and preparing it properly will set you up for success well before you even fire up your smoker.
Meat selection is everything. If you want an outstanding brisket you have to start with quality meat. Understanding the different grades of meat, what to look for, and how to select the perfect cut is a crucial part of producing great-tasting brisket.
You will want to start with at least a choice grade. Choice grade has good marbling (fat) in the meat. Fat adds flavor and helps keep the brisket moist during the cooking process. The fat also helps the meat stay nice and tender.
Tips for Selecting a Brisket
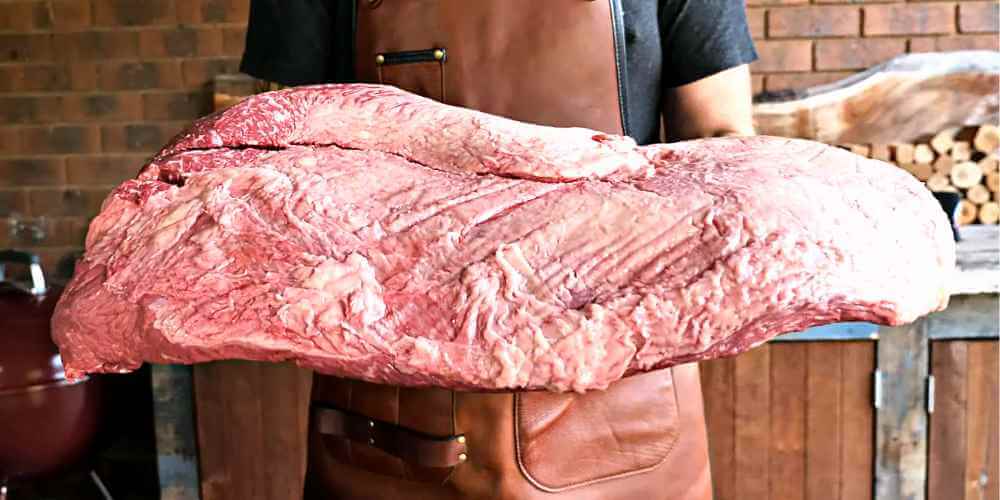
- Buying a whole packer brisket lets you have full control over the trimming process.
- When selecting your brisket look for marbling in the meat and a thick flat so the leaner part will cook at almost the same rate as the larger point.
- Look for USDA Choice, Prime or Certified Angus Beef
- Look for meat that is hormone and antibiotic free and certified natural and humane
The Three Most Common Beef Grades (from highest to lowest level of marbling)
- Prime – Highest quality and most intramuscular fat or marbling
- Choice – Most widely available, less marbling than prime
- Select – Leanest of the commonly available grades, not as juicy or tender
Parts of a Brisket
There are essentially 4 parts to an intact, whole brisket:
- Flat Cut
One end of your brisket is thinner and flatter than the other, with a more uniform square edge. This is the flat cut of your brisket.
The flat cut of the brisket is made up of the deep pectoral muscle known as the pectoralis profundi. It is a rectangular piece of meat and is the most common cut to see in the meat aisle. It’s often labeled as “brisket” when sold on its own.
The flat cut is larger than the point and makes up most of a whole brisket. It is a popular choice because it cooks up evenly without much fuss. It’s very easy to cut attractive slices from a brisket flat, and the meat delivers a tasty amount of bark along the edges of the slices.
Since the flat cut is thinner and less fatty than the point, it usually reaches its ideal temperature sooner. It’s also a more uniform shape than the irregular point cut, which makes for a nicer presentation.
The downside to the flat cut is that the meat is leaner and has less fat marbled throughout than the point cut. It is easier to overcook, and if you smoke it for too long it may resemble brisket jerky. That’s one reason I prefer to trim my briskets at home, so there’s enough fat cap remaining to keep my flat cut moist.
- Point Cut
The other end of your brisket is smaller, rounded and up to several inches thicker than the flat end. This is the point cut of your brisket.
The irregular point cut is made up of the pectoralis superficialis muscles. The point partially overlaps the flat cut, and they are separated by a thick layer of fat and connective tissue called the deckle.
Contrary to the rumors on the Internet, the point cut IS NOT the deckle (see below)!
Even when trimmed, the point cut has a lot more fat than the flat cut and often cooks up incredibly juicy. It is a harder cut to smoke evenly because it varies from a half-inch up to several inches in thickness. It usually takes longer to cook than the flat, which can be tough when you’re making an entire brisket.
When smoking a whole brisket, folks often pull the brisket when the flat cut reaches the ideal temperature. Then they separate the point cut and return it to the smoker to finish cooking solo.
This is a great way to balance the needs of the different cuts without cooking them entirely apart and helps the flat cut stay juicier. If you toss your point cut back onto your smoker you can turn it into another BBQ favorite- burnt ends!
- The Fat Cap
When you look at a packer brisket, you’ll see one side is covered in a deep layer of fat. This is the fat cap of the brisket. This cap covers the meat from the flat cut all the way to the point. The fat cap is typically about an inch or so thick.
The fat cap is made up of both soft and hard fats, which react differently to the heat inside the smoker. The soft fat may render out if the layer isn’t too thick, but the hard fat never does.
You’ll want to trim the fat cap of your brisket to between ¼ and ⅛ of an inch in thickness and remove most of the hard fat from the point end. This will leave your brisket enough fat to stay moist and juicy without preventing the bark from developing.
- The Deckle
If you follow the line of fat dividing the flat and point cuts on an untrimmed brisket, you’ll eventually come to a big swirl of fat and cartilage. This is the deckle.
The deckle is the part that anchors the brisket to the rib cage of the steer. It is a thick layer of fat and tissue that divides the flat and point cuts and holds them together. It does not render out in the smoker, so you definitely want to trim it away.
Once removed, your brisket will lie flatter and the point end won’t be quite as thick as it was. This will help your brisket cook evenly in your smoker and makes it very easy to separate the cuts at the end of the smoking session.
Nearly all packer briskets sold in the US are deckle-free or “whole brisket deckle-off.” So you likely won’t even have to bother trimming it away. If you happen to buy a packer with the deckle still intact, definitely trim it out.
Step 2: TRIMMING
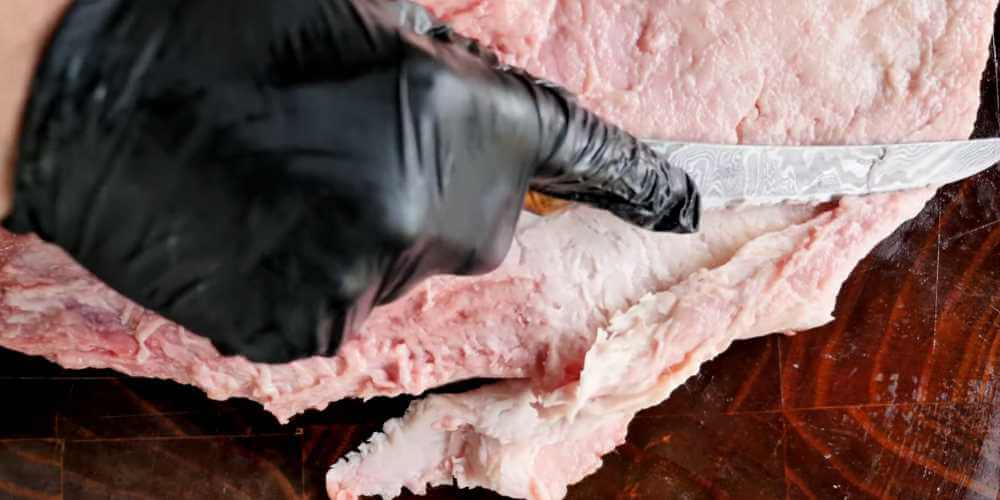
Trimming a brisket is essential to getting the perfect smoke on your beef brisket. This step by step guide will teach you all you need to know on how to trim a brisket so it can be beautifully prepared before going on the smoker.
You want to trim off all the large thick pieces of fat. This “bad fat” will not render down during the cooking process. Trim this down to approximately 3/8″ thick and make sure the fat layer is even.
Trim some gray meat off on the edges just enough until you start to see the redness in the meat. Even after trimming, you’ll still be left with good fat throughout the brisket to help hold flavor and keep it moist.
Tips on How to Trim a Brisket
- Use a good narrow curved boning knife for trimming the brisket (using a blunt knife is a good way to stab yourself).
- If you don’t trim any fat off the brisket it will taste too fatty, but trimming too much will make your brisket dry. Aim for around 1/4″ of fat.
- Brisket is much easier to trim when it’s still cold so trim it right after you take it out of the fridge.
- There is a thick membrane called the deckle that will not render out during cooking, you will need to cut out (some butchers will have done this for you).
Step 3: PREHEATING
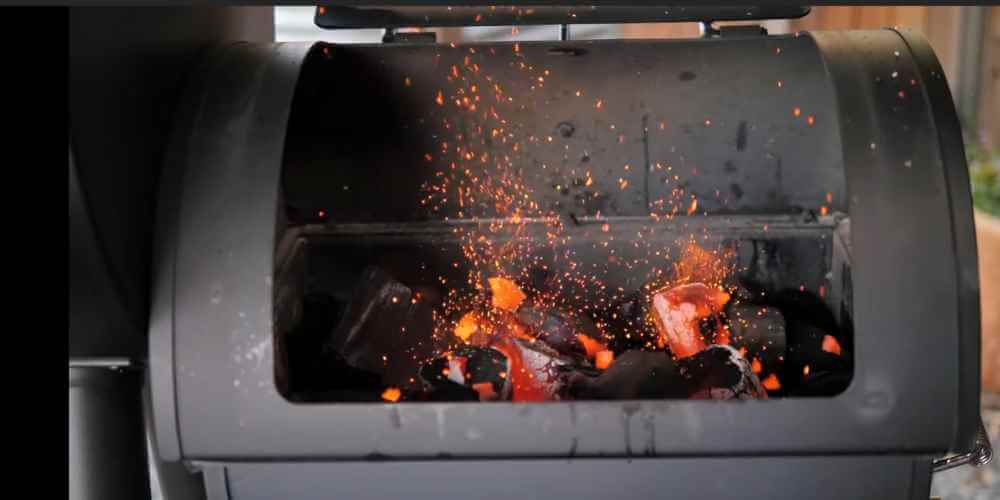
Before you place your meat in your smoker, it is important to preheat your smoker. Before adding in your brisket make sure the smoker temperature has stabilized at 225°F. Maintaining 225°F will give your brisket plenty of time to break down. Allow up to 30-45 minutes for your electric smoker or add wood splits every 45 minutes to 1 hour for at least the first 4 hours for wood smoker to finish preheating; use hard woods for smoke like oak and cherry.
Types of Smoker for Briskets
- Propane Smokers
Strong points
- Easy to use, easy to control the temperature
- Quite quick to start, preparation time is within 15 minutes
Weak points
- Chemical smell
- Need frequent checks on gas and temperature
- Charcoal Smokers
Strong points
- Excellent flavor, restaurant-standard for brisket lovers
- Easy to find the right smoker that fits customers’ need
- Authentic smoking taste
Weak points
- Need to pay continuous attention while cooking
- Require some technique to control fires and temperature
- Electric Smokers
Strong points
- The most user-friendly type
- Do not require to buy fuel or wood
- Easy to control and sustain temperature
- Do not have to check very frequently
Weak points
- The taste and flavor are less appealing, it lacks smolder heat to create a smoking taste
- Do not suitable to create crisp
- Wood Pellet Grills
Strong points
- Versatile in styles and sizes
- Have an actual smoking flavor
- Cleaning up is easy
- Very functional, one-for-all solution, it can be smoker, grill, and oven
Weak points
- It comes at a not so cheap price. The average you should spend on a decent one is about 300 to 500 dollars
- You need both electricity and wood pellets for this to work
Step 4: SEASONING
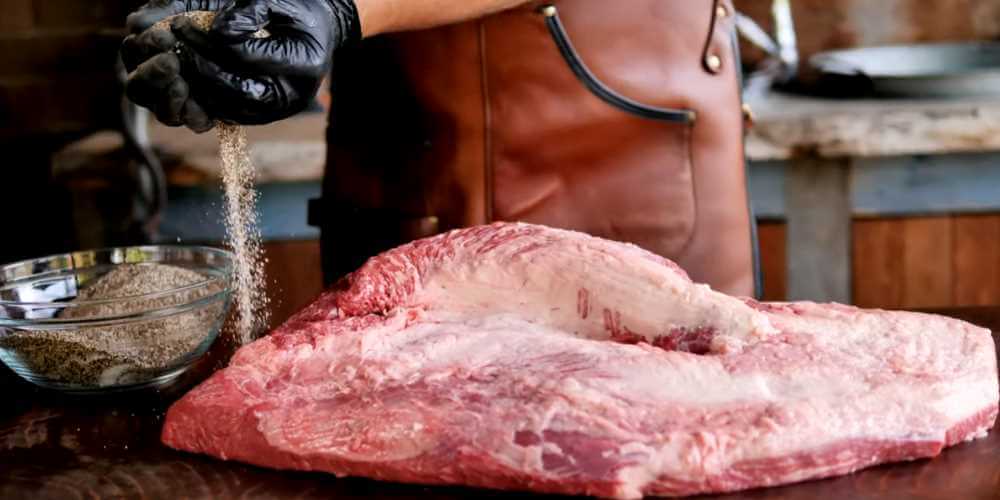
Give it a good rub. The three main ingredients in cooking a good brisket are salt, pepper, and garlic (SPG). Experiment with different rubs and flavors to see what you like best.
You can add a more complex flavor profile to the SPG base by using a rub that will enhance the wonderful beefy in depth flavor.
Tips on Seasoning a Brisket
- Make sure you swirl the mixture as you apply it, as the salt can settle to the bottom.
- Apply rub to the edges of the brisket, using your free hand to catch rub and push it back on.
- Let the brisket warm up to room temperature for an hour before putting it on the smoker for a more even cook.
Top 5 BBQ Brisket Rub Recipes
From sweet to spicy, these rubs will add delicious flavor
- Brown Sugar Rub – Smoked barbecue brisket works great with sweet flavors. This brisket brown sugar rub starts with brown sugar (choose a dark brown sugar for added molasses flavor) and then picks up the salt and seasoning that finishes off a good rub. You can adjust the heat of this rub by choosing a hot or mild chili powder. Because of the brown sugar crystallizing, it will only last a few days in the pantry.
- Easy Brisket Rub – This easy brisket rub is built on the basics of barbecue. The combination of paprika, sugar, and salt give it the color and the flavor effect you want while the garlic and onions powders, as well as oregano, add depth. This is a simple rub and the perfect place to start if you are new to smoking brisket.
- Texas-Style Brisket Rub – This brisket rub has the spicy heat that makes Texas-style barbecue rub great. You can add sugar to this rub if you want to cut the heat a bit, but what makes it Texas-style is the spice. This rub also has a rich layer of herbs and spices, like cumin, coriander, and oregano, that will make your brisket really stand out.
- Barbeque Brisket Rub – This barbecue brisket rub starts with a good portion of salt, but don’t worry—by using a coarse salt, it will absorb more slowly into the meat without picking up too much of the saltiness. Don’t apply this rub too early or the surface of the meat will begin to cure.
- Chipotle Dry Rub – Chipotle chilies add a smokey heat that is perfect for brisket. Use dried chipotles to keep this chipotle dry rub dry. (You can buy chipotle chili powder but it is a bit more expensive.) A hint of orange in the form of dried orange peel is the perfect companion to the chipotle, helping to bring all of the flavors together.
Step 5: SMOKING
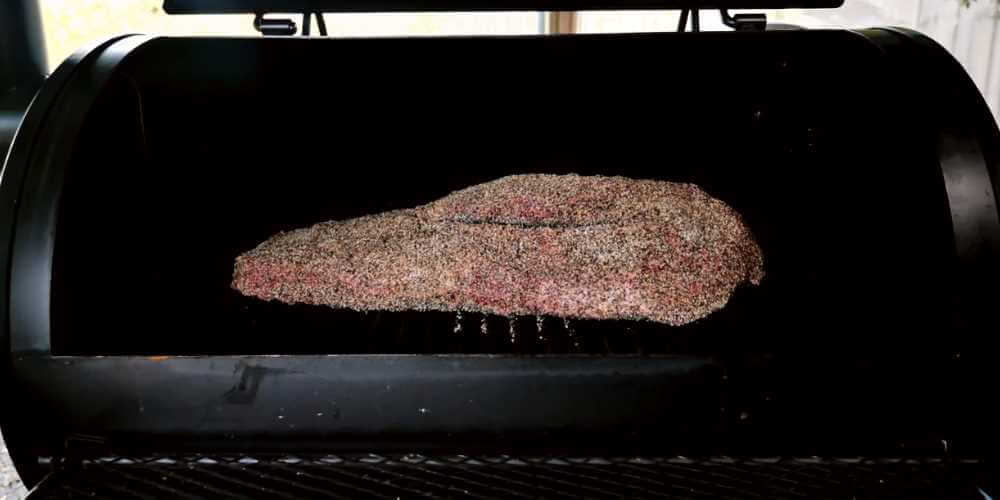
Now that you’ve built your fire and seasoned your trimmed brisket, it’s go time. Place the brisket in the smoker with the thicker point facing the direction of your firebox or the hottest part of your grill.
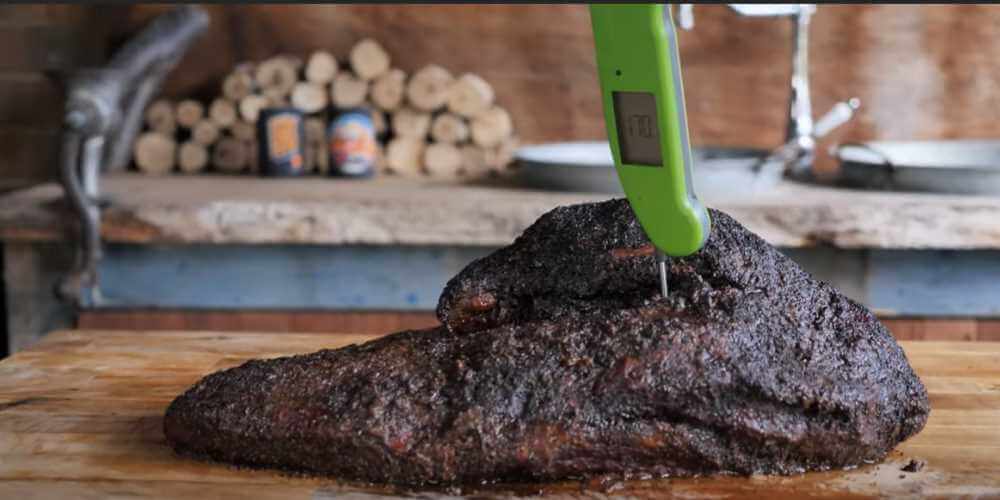
The fatty, thick point will be better able to handle the brunt of the heat from the fire without drying out.If you’ve got a remote thermometer, insert the meat probe into the center of the brisket directly into the meat, not the fat. Tend to your fire for the next 3 hours. The first exposure to the smoke is so essential to the final result of the brisket. A majority of the smoke penetration happens during this time.
Tips on How to Cook Your Brisket
- Place the brisket on the smoker fat side up.
- Depending on your smoker, if the heat is coming from below, consider smoking fat-side down to protect the muscle from drying out too much.
- Place the fattier point of the brisket closer to the fire. The extra fat will help insulate it.
- The flat end of the brisket should be closer to the smoke stack.
- Always use a water pan to help keep moisture in the cooking chamber and avoid burning.
- A good rule of thumb for working out how long a brisket will take to cook is 1 hour and 15 minutes per LB (0.45kg) of brisket at 250°F (120°C).
Tips on How to Manage Brisket during Cooking
- You need to keep a close watch on your smoker and keep the temperature steady.
- When the lid of the smoker is open you’re losing heat and smoke and it’s going to take awhile to recover the heat. “If you’re looking you ain’t cooking”.
- Check it as little as possible, and if it’s looking dry consider spritzing it using a spray bottle with some apple juice or apple cider vinegar.
Tips on How to Keep Your Brisket Moist
- Keeping a water pan in the smoker is the best way to retain moisture.
- After the first 2-3 hours start spritzing your brisket with water, apple juice, hot sauce or apple cider vinegar every 30 minutes to an hour. This helps keep it moist and stops it from burning.
- Some people use a liquid mixture to mop the meat but this causes a bunch of mess and can interfere with the bark on the brisket.
Step 6: SPRITZING
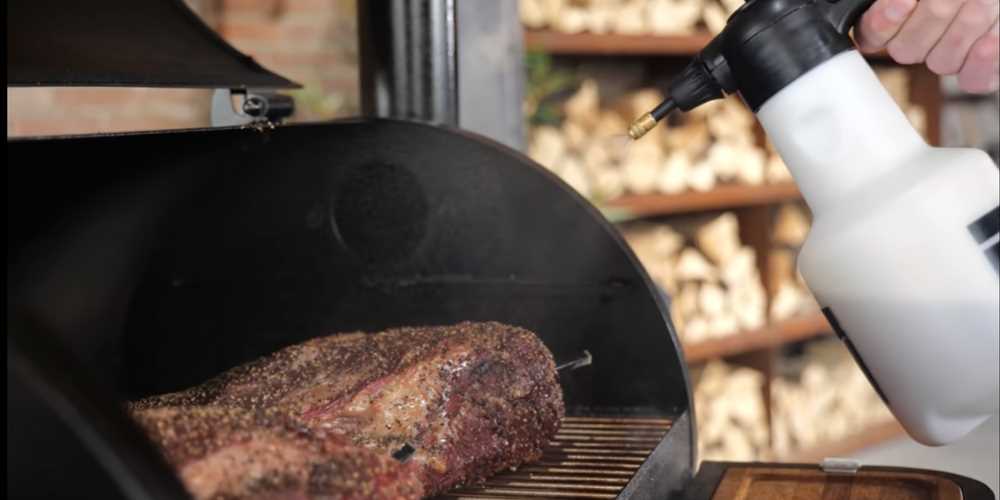
You are ready to take things to the next level and try spritzing? Let’s do it! After the initial smoke period, it is time to really build that beautiful coveted bark on the exterior of the brisket. Over the next 5-7 hours, your brisket will slowly rise in temperature. Using a spray bottle filled with water to keep things moist, or beef stock to add some richness, or beer for flavor, or a combo of all 3, lightly spritz your brisket every 45 minutes to an hour.
Tip: This is a divided house in the brisket world. Some never open the lid until that brisket has been in for at least 12 hours or crack the lid every hour to check on the meat and add more moisture to the brisket. If it’s your first time smoking a brisket, keep it simple. Skip the spritzing step and use that time to maintain the temperature in your smoker instead. Your brisket will take about 8-10 hours during this first phase.
What is Spritzing?
Spritzing is another one of the many ways that you can take control of the cook. Adding moisture, changing textures, adding flavor, and developing the smokiness. This process is used when barbecuing many different meats, but when it comes to brisket it’s a whole new ball game.
What To Spritz Brisket With
- Fruit Juice: Apple, pear, grape, even pineapple are all good choices for building a sweeter and stickier bark. One part fruit juice and one part water makes for a solid and effective spritzing liquid.
- Cider Vinegar: Pear or apple cider vinegar can make for a tangy, and complex flavor profile for your brisket. To make sure it’s not too vinegary, mix one part cider vinegar with one part water, or one part fruit juice for extra sweetness.
- Hot Sauce: Hot sauce yields the most flavorful results, as in, you can actually taste the difference when you bite down on the bark. It’s always best to use a more watery hot sauce like cholula, or red hot, but you can spritz or baste on a thicker sauce if that’s how you like it!
- Beer: Beer has its own complexity of flavors, and the slight hoppy and fruity notes work well as a spritzer liquid. Again, you can choose to water it down, but unless you’re using a dark thick beer it’s not necessary.
- Water: if you want to increase humidity, slow the cooking process to build more smoke flavor, or just want to keep the meat moist, you can just spritz with 100% water.
Step 7: WRAPPING
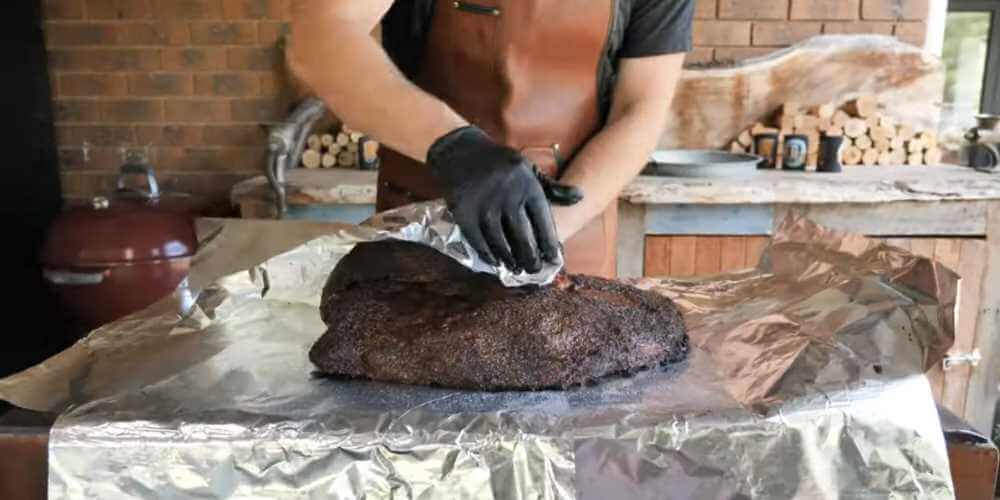
Wrapping the brisket in foil (the Texas Crutch) or butcher paper is an optional step that can help you in some circumstances.
When you wrap a brisket three-quarter of the way through the cooking process it locks in the moisture and helps get it through a critical part of the cooking process known as “the stall”. Do your best to wrap the brisket with no exposure, gaps, or holes by overlap folding.
You can use either Peach Paper, a pinkish-brown type of food-grade butcher paper, or aluminum foil. Both are good choices. Wrapping the brisket in foil is referred to as the “Texas Crutch”. With Peach Paper you will still get a little more smoke on the brisket while retaining moisture as opposed to using foil. Both of these wrappers will help maintain temperature and power the brisket through the stall.
Tips on How to Wrap your brisket and deal with the dreaded stall
- It can help the brisket retain moisture and push through the stall faster.
- If your smoker is giving off too much smoke wrapping can also help.
- Wrapping in foil can help accelerate the cook time if your guests are getting impatient.
- You can wrap the brisket after around 4-6 hours or you can cook for 11 or 12 hours and never need to wrap it. It all comes down to fire management and personal preference.
- When the internal temperature of your brisket hits around 150°F -170°F the temperature can stall as the brisket tightens up and squeezes out moisture. Patience is key.
How to Wrap Brisket in Foil or Butcher Paper
For the wrap, you’ll need two wide sheets of foil or butcher paper that are four times longer than your brisket is wide.
- Place one sheet of paper on your workstation, with the long edge running perpendicular to you. Place the second sheet on top so it overlaps by about half its width. Lay the brisket lengthwise across the paper, presentation side up, about one foot from the bottom edge. Give the brisket one last spritz with apple cider vinegar anywhere that a needs little moisture, then lightly spritz the surface of your wrap for good measure.
- Fold the bottom edge of your paper over the top of the brisket and pull it as tight as you can. Every fold you make should conform with the shape of the brisket.
- Tightly fold in one side of the paper over the flat, so that it conforms to the shape of the brisket and runs at an obtuse angle away from you. Smooth out the paper.
- Tuck part of the paper on the opposite side under the point to secure it, then fold in the paper over the top, so that it conforms to the brisket and runs at an obtuse angle away from you. Smooth out the paper.
- Roll the brisket over one more time. The presentation side should now be facing upward with a double layer of wrap beneath it and the wrap tightly surrounding it on all sides. Holding the wrap tightly around the brisket on all sides, roll the brisket over and pull tightly to secure the paper. Fold in the sides again.
- Fold the top end of the paper over to double its thickness.
Types of Brisket Wrapper
- Pink Butcher Paper
It is also known as peach paper or the BBQ paper. It is highly popular among BBQ professionals for wrapping briskets/meat for smoking. This is because foil is non-porous and it does not allow the steam to escape during smoking. It will condense and in turn, soil the crispy bark of the meat.
This butcher paper ranges in color from light tan to dark pink, which works well at masking any blood or juices from raw meats. The paper is strong enough to prevent leaks while still allowing the packaged meat to breathe, preventing sogginess. Peach butcher paper is ideal for wrapping meats for smoking because it allows the flavorful smoke to be absorbed while still protecting the meat from contaminants.
- Aluminum Foil
Wrapping your brisket in aluminum foil is the exact opposite of smoking your meat bare. The tin foil creates a bit of an oven, which retains heat and will partially bake your brisket as you smoke it. This cuts down the cook time compared to cooking without a wrap. Wrapping in foil is known as the “Texas crutch”— an effective way of finishing a long cooking time without drying out the meat and keeping a steady internal temperature. It captures the meat’s fat and juices, so they can be reabsorbed once the meat is taken off the smoker to rest.
Step 8: RESTING
Once your brisket has reached a good temperature and feels soft and pliable in your hands, it is time to remove it from the smoker. Place your brisket on a baking sheet and let it rest for an hour at room temperature. This will allow the brisket to come down from the mouth melting temperature of 200 degrees F to a more palatable 165 degrees F or so.
Tip: If you aren’t planning to serve your brisket for over an hour, wrap it in a towel and place it in a cooler. This process will help your smoked brisket maintain a good temperature.
Step 9: SLICING
Make sure you have everything you need before you make your first cut. Prepare your cutting board, knife, and towel ready first. Slicing a brisket must be done right. It is a huge part of having the perfect smoked brisket experience. Timing is also very important. The sliced brisket deteriorates with every second after it is cut.
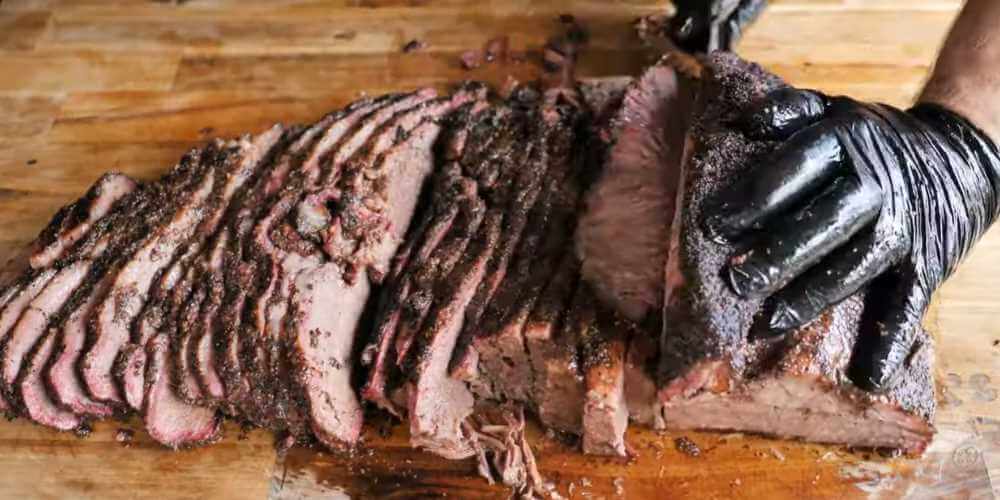
One of the things you must do when slicing the brisket is to slice across the grain of the meat. This will make the slices of meat very stringy and tough. There are two sections of the meat, the point and the flat, and the grain runs in two different directions between the two sections. Make sure to cut the brisket in half first, where the point meets the flat, to separate the two sections. This will ensure you are cutting against the grain for both sections as you continue to slice the rest of the meat.
Knowing how to slice a brisket correctly will give you tender, melt in your mouth, smoked meat. This will ensure a mouth-watering bite every time.
Tips on Slicing a brisket
- Once you’ve taken the brisket off the cooker and let it rest for about an hour you are ready to slice.
- The proper way to slice a brisket is to cut against the grain on the flat side until you get to the point. And then turn the brisket 90 degrees and then cut against the grain.
- Try and avoid scraping off the bark.
- Use a 12″ serrated knife or check out our breakdown of the best brisket slicing knives for more in depth reviews.
- Cut each slice around the thickness of a big pencil on the fattier part and a small pencil on the leaner part.
Keeping your brisket warm
When the brisket temperature gets to around 203°F, wrap it in foil or an old towel, and then place it in a beer cooler. The faux cambro technique is a lifesaver.
- Before the meat is ready, pour some hot water into the cooler and close the lid to allow it to heat up.
- Dump the water out and line it with a few old towels to help insulate and in case of leaks.
- This technique will allow you to keep meat safe for up to 3 hours.
What is a Faux Cambro?
A Faux Cambro is a home-made insulated, temperature holding box. You can easily do-it-yourself using a large plastic cooler or any other similar tool.
This tool is a very popular and essential equipment, used mostly by kitchen professionals and caterers. It is originally made by Cambro Manufacturing and has quickly gained popularity thanks to its effectiveness. It is an insulated box that allows you to keep or transport your food while maintaining its safe temperature zone for a long period of time.